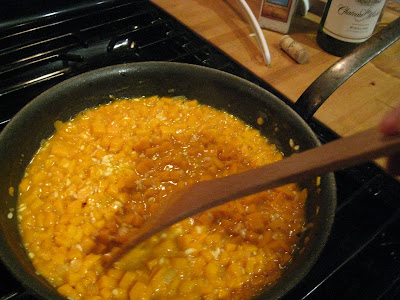
Here's the thing, it does take about 20 mins of uninterrupted time at the stovetop, stirring. It is definitely not something you can throw in the oven and walk away from. But depending on your ingredients, your prep may only take 10 minutes so you are looking at 30 minutes of cooking time total. Same as a stir fry or pasta. And I find the stirring to be therapeutic. A good time to think about the days events, zone out or (ahem) read a book or magazine in your other hand. (paperback recommended) Even when I was working it was something I made often on the weeknights.
I made this sweet mama squash and bacon risotto a few nights ago and took pics, but I thought I would describe the general methodology to you if you want to play along at home.
Here is what you will need:
- an aromatic of some kind. Shallot is traditional. I rarely have shallots but I always have onions so that's what I use most of the time. You could also include garlic (in addition to an oniony thing or alone), ramps, leek, etc.
- 1 cup A short, starchy grain. Arborio rice is traditional. Barley works great and is a healthyish alternative (although you can no longer call it risotto). I've read recipes that used short grain brown rice but have never tried it.
- 1/4 cup A mild flavored alcohol. Dry white wine is traditional and preferred. In a pinch I have used sherry and dry vermouth. I bet sake would work. If your other flavor components are strong enough to stand up to them, cognac or red wine might be doable. (i have made it skipping this step and it is not worth it! The end result is very bland)
- 5-6 cups liquid. You can't go wrong with chicken stock. Veggie stock is good too. You can use water, although it is better if you can flavor the water a little. For example, if you are using a fresh vegetable you can blanch the vegetable in the water, or for a shrimp risotto take the tails/shells off shrimp and boil them in the water for a few minutes. For a heavier ingredient you might be able to use veal or beef stock but I can't vouch for either of them.
- something to put in the risotto. In the spring i might do fresh asparagus. In the fall pumpkin or mushrooms. Frozen peas and shrimp work great anytime individually or together. you are limited only by your imagination!
- 2 tablespoons of butter. Unsalted preferably. The recipe for the risotto i made below called for marscapone which i'm sure would have been wonderful if I had had any.
- sharp italian cheese. Parmesan of course. Pecarino Romano. anything like that. As much as you and your family like.
Ok. this is what you do:
1. Heat your liquid in a pot. Recipes usually call anywhere from 4-6 cups of liquid for a cup of grain. I usually try to have 6 cups on hand although I often don't use it all. The organic chicken stock I buy at Costco comes in quart containers. I know it can be a little salty so i will usually use water if it goes beyond that and everything works out hunky dory. Once the liquid is heated turn the burner down low to keep it warm during the cooking.
2. While the liquid is heating, pre-cook your main ingredients. This could mean blanching vegetables or shrimp in your heated liquid. Or sauteing mushrooms in the pan you will be cooking the risotto in. The risotto i made in these pictures is a little unusual in that the main ingredient was cooked along with the rice. Most of the time you will want to at least partially cook your main ingredient and then it will be added at the end of the cooking process to be warmed through.
Here you see my warmed chicken stock. In the risotto pan i am crisping some bacon. (The bacon will be added at the end)

3. Take a (preferably nonstick) wide pan. Add a couple of tablespoons of olive oil or butter (or one of each) and heat over moderate heat. Add your aromatics and cook until clarified.
In this case, I used the bacon fat left in the pan and added my main ingredient, sweet mama squash at the same time as the aromatic.

4. Add the grain and toast for about 2 minutes. Stir to get all of the grains coated in the fat.

5. Add the wine (or whatever alcohol your using) and let the stirring begin!

6. Stir, stir, stir until the liquid is completely absorbed. As you can see in the pic below, the rice is already releasing some of its' starch. On its' way to becoming creamy risotto!

7. Start adding your heated liquid to the risotto pan, one ladleful at a time. Stir each ladle of liquid until it is completely absorbed. The constant stirring is vital because otherwise the grains will not absorb the liquid at the same rate. You will end up with half cooked rice and half crunchy. Not good.
It will take about 20 minutes to fully cook the grain. This pic is taken about halfway through and you can see that "fully absorbed" takes on a different meaning is the starch continues to release.

8. After about 20 minutes or 4 cups of liquid have been absorbed (whichever comes first) Add your main ingredient and start taste-testing the rice for doneness. This is completely to your preference. The rice will continue to soften somewhat after you stop adding liquid. I generally stop once the rice has no definite crunchiness but there is still some resistance. If the rice is still crunchy I add more liquid, stir till absorbed and then do another test.
9. Adjust consistency. After many risottos, I know my family prefers it on the soupy side. You may like it more dense. Just as the rice will continue to cook after you take it off the heat, the risotto will continue to thicken slightly as well. To get it perfect for us, when the rice is done to my liking I add one more ladle of liquid and cook it for just a minute before...
10. Turn off the heat and add your butter. Stir until all gone.

11. Add cheese and stir until all gone. If you're unsure of how much you like, start with about 1/2 a cup grated and then you can add more if you want

12. Plate that bitch up! a little something on top is always nice. Maybe some fresh chopped parsley, or just a little more shavings of parmesan, or you know...BACON.

If you don't make it already, i hope you'll try it soon!

7 comments:
thanks babe! I truly need this primer, I have never tried risotto
Great recipe and technique post. And the pictures look yummy.
How much does 1 cup of rice/starch make? Is that one meal for your whole family? I'm thinking I might need to double that for Andrew's appetite
Dan just bought frozen mushroom risotto at Trader Joe's. I'm sure it will be good, but yours looks much tastier. Lisa
Reading your blog and your father's I have no excuse for boring cuisine.
Thanks for the step by step info.
I totally agree with you that risotto is underrated as a "regular" dinner option. Mmm. Risotto.
I think I just drooled on my keyboard.
Post a Comment